Crimping Without Losing Your Mind
Crimping is where hobby wiring either becomes reliable or becomes a lifetime supply of intermittent gremlins. The good news: the rules are few, and one of the best moves is knowing when not to crimp.
The rules
- Crimp contacts are family-specific. An XH housing takes XH contacts; PH takes PH; "Dupont" takes its own. Housings and terminals must match — kit-drawer mixing is how contacts back out of housings.
- Open-barrel crimps have two sets of wings: conductor wings that fold onto bare strands (the electrical joint) and insulation wings that grip the jacket (the strain relief). Both must be formed correctly — a crimp that only grabs insulation reads as "works, sometimes."
- Cheap generic crimpers can work for learning, but are inconsistent — die profiles only approximate each family's spec, so quality varies crimp to crimp. Fine for prototypes you can re-do; risky for anything that has to stay working.
- Official/OEM tooling is expensive but controlled — the die matches the contact drawing and produces repeatable results. That's what you're paying for. (This is exactly the engineering track's tooling discipline at hobby scale.)
- Strip length matters — strands should fill the conductor wings and just be visible past them; too long shorts into the mating area, too short crimps onto insulation.
- Wire gauge and insulation diameter matter — every contact has a supported wire and insulation range; outside it, the wings can't form properly.
- One wire per crimp barrel. Doubling two wires into one terminal is done all the time and is wrong essentially every time: the barrel, die, and wire are qualified as a system for one conductor in a stated range, and a crimp only works by compressing that qualified fill into a gas-tight joint.1 Doubled wires never consolidate that way — one bundle usually ends up loose, and the joint corrodes from the inside. This isn't just folklore: NASA's public crimp workmanship standard settles it in one line — contact-conductor combinations shall be in accordance with manufacturer's recommendations.2 Manufacturers do qualify specific dual-wire combinations and publish them for specific terminals — the exception that proves the rule3 — so unless the documentation for your terminal says two wires, build the branch with a proper splice, a lever connector, or a terminal actually rated for two.
- Soldering a crimp terminal is usually a smell. Solder wicks up the strands and creates a stiff spot that fatigues and breaks right at the joint — and it usually means the crimp didn't hold on its own. (Rare intentional exceptions exist; they're not the hobby default.)
- Bad crimps cause intermittent failures, and intermittents are the most expensive failures to find.
- Inspect every crimp: conductor wings on bare strands, insulation wings on jacket, no stray strands, contact not deformed.
- Pull test gently — a correct crimp survives a firm tug; a wrong one comes off now instead of in the field.

The geometry to inspect for. What line art can't show is surface texture and deformation — which is why the inspection rules above still apply to every real crimp you make.
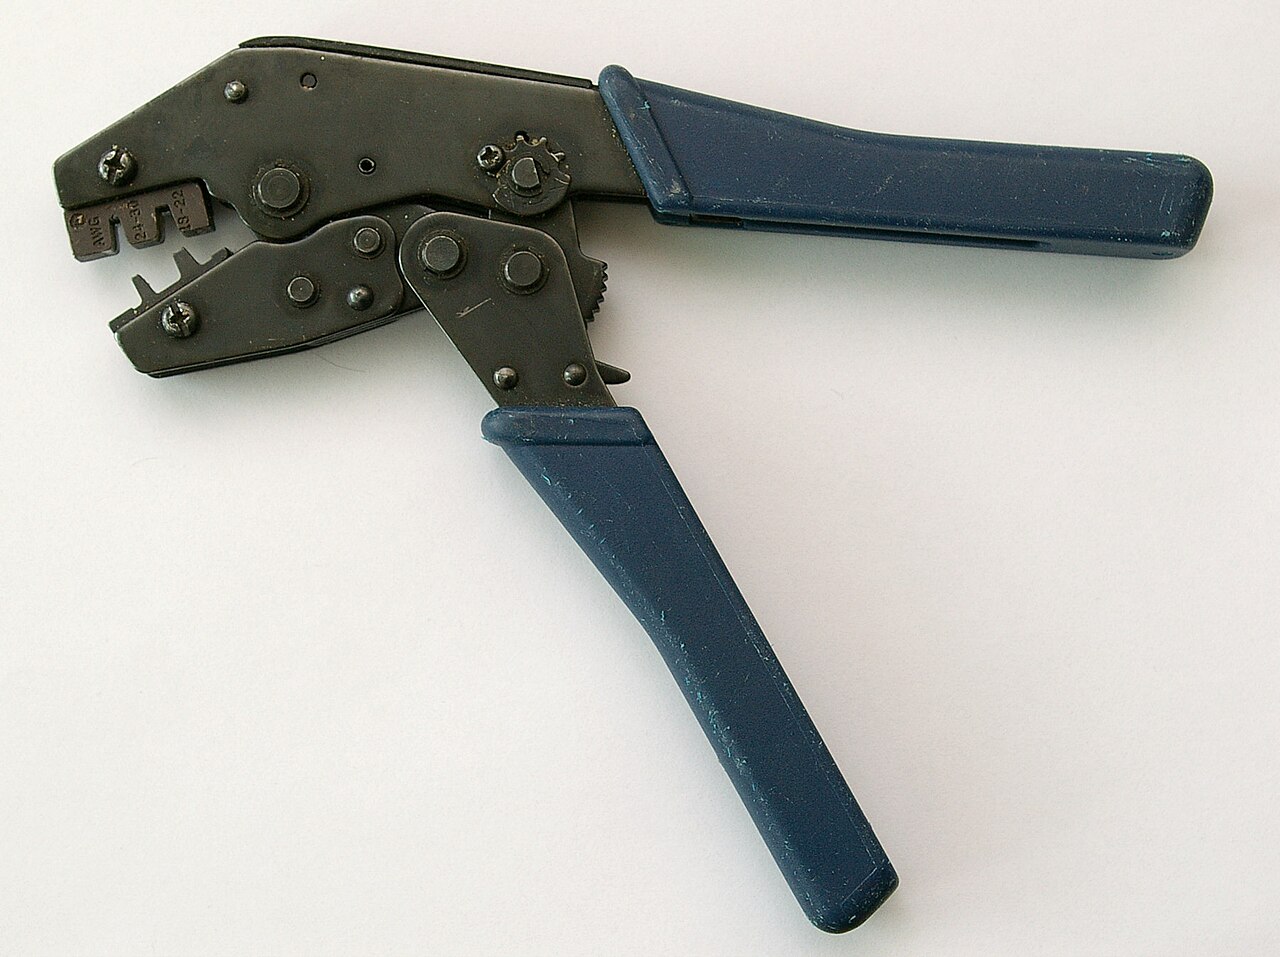
A ratcheting crimper with die positions marked by wire range (here AWG 18–22 and 24–30). The ratchet forces a full stroke every time — the consistency cheap plier-style tools can't give you. The die profile still only approximates each family's spec. Photo: Smial, CC BY-SA 2.0 DE, via Wikimedia Commons.
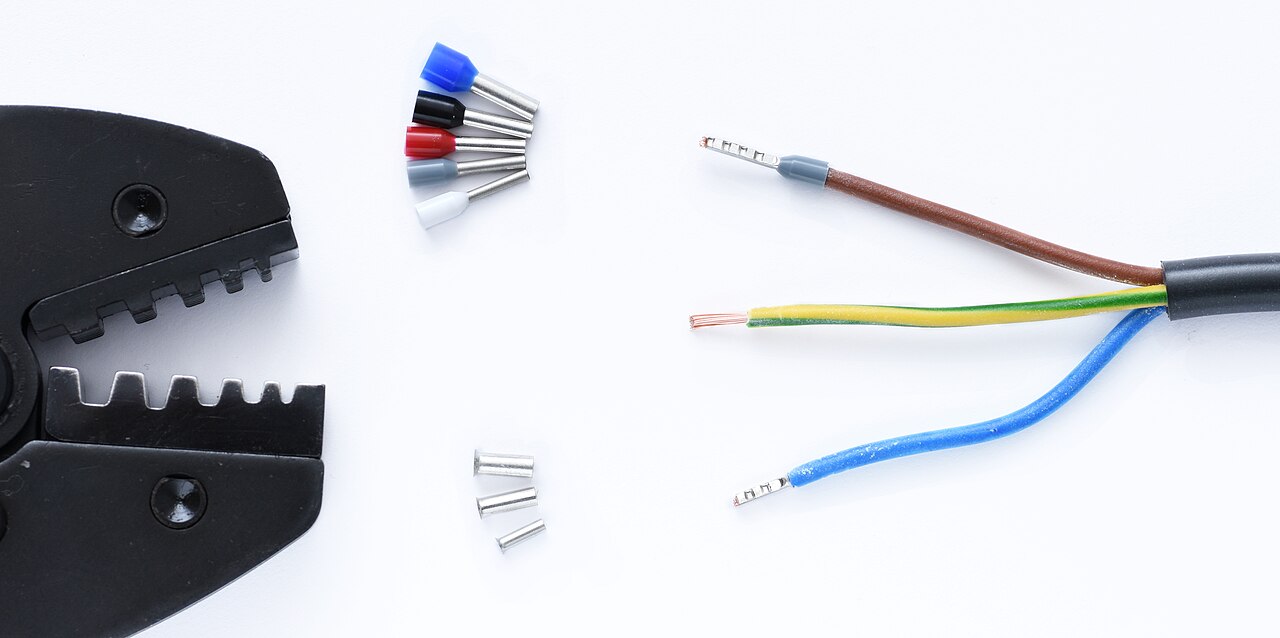
The other hobby crimp: ferrules for stranded wire going into screw terminals — insulated and uninsulated ferrules, the crimper, and finished ends. Photo: Simon A. Eugster, CC BY-SA 3.0, via Wikimedia Commons.
When to use pre-crimped leads
Pre-crimped leads (factory-terminated wires you insert into housings yourself) are often the best hobby choice:
- Tiny JST-SH / GH / PH terminals — hand-crimping these is genuinely hard even with decent tools.
- One-off projects — tooling cost can't amortize over one build.
- Student projects — remove the least-reliable process from the critical path.
- When tooling is not worth buying for the families you rarely use.
- When reliability matters more than DIY purity. A factory crimp from a reputable supplier beats a first-year hand crimp every time — that's engineering judgment, not cheating.
You still choose the housing, verify the family/series, and confirm wire gauge — pre-crimped just outsources the metallurgy.
Building something that others will use, or heading toward production? The engineering track covers termination types (§5.2), the crimp design package (§4), and the IPC/WHMA-A-620 workmanship/acceptance world.
Related: Buying the Right Mating Parts · Connector Kits · What People Forget (tooling edition).